
The ImageAnywhere app for windows is a native windows 8.1 and 10 application that sends images to the Unified Cloud. The windows app is primarily used to capture data and is used for integrating with the instruments in a practice. CloudCAM and connect kits use the Windows app exclusively for sending information to the cloud.
This app can be downloaded from the windows store. https://www.microsoft.com/en-us/store/apps/imageanywhere/9wzdncrdn1cs
The app should be located on the taskbar of the computer/tablet or as a link on the desktop.
Follow these step by step instructions and watch the video to learn how to Modify Image Data
Modify Image Data
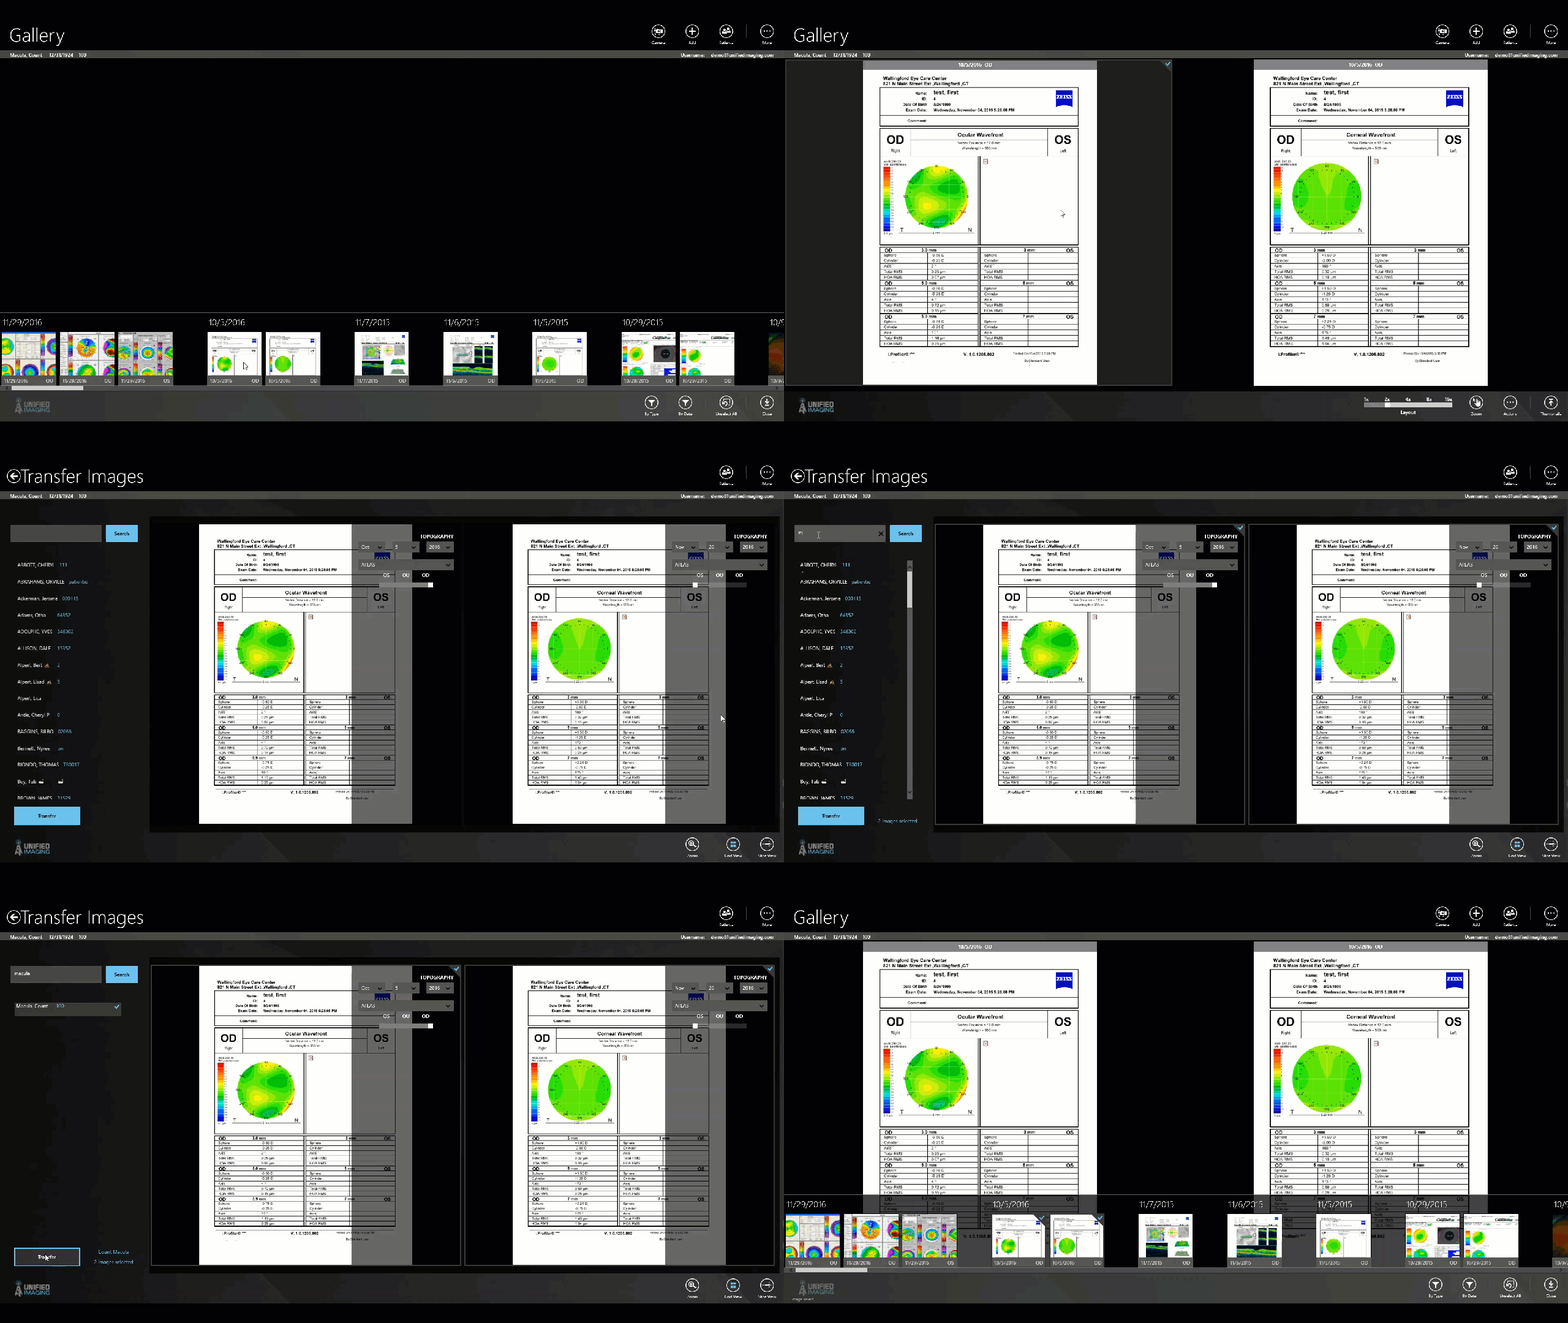
- Image Data is modified through the transfer image process. Simply follow the steps for transferring images, but instead of transferring to a new patient, transfer to the same patient.
- Right click on a selected image (or select multiple images). Tip: Right click directly on the image itself for the context menu to show up.
- In the context menu select “transfer selected”
- On the transfer images screen:
- Select the patient on the right that images should be transferred to (in this case, it is the current patient you are in)
- Select the images to be transferred (TIP: select "Ctrl+A" to select all images at once)
- Update the images property fields to match correct date and device and eye
- Select “transfer”
- Images will be transferred back into the patient chart
Comments
0 comments
Please sign in to leave a comment.